Containers
Once you have selected the Source Type and uploaded/connected a sample file, the Containers tab is displayed.
Containers Displayed
The containers displayed depends on the Source Type:
|
Source Type |
Containers |
|---|---|
| delimited | Only has one container, called row container.
|
| fixed width | |
|
JSON |
Only has one container, called root. |
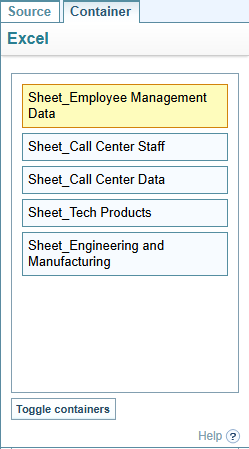
| Excel | Has a container for each worksheet selected. |
|
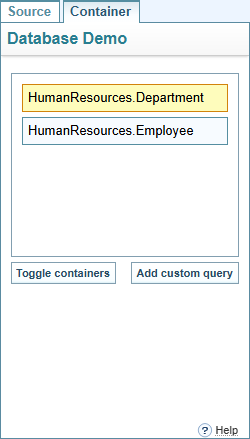
Database |
Has a container for each table selected. You can also create your own container with a custom query. |
The image below shows an example of containers created from an Excel file. The currently selected Container is highlighted in yellow.
The image below shows an example of containers created from a Database connection. The currently selected Container is highlighted in yellow.
What is a Container?
Containers represent a unique set of data. For example, in an Excel spreadsheet that has multiple worksheet tabs, each worksheet tab becomes a Container.
If the data for a Container does not need to be imported, you can unselect the container using the button.
Configuration per Container
Each container requires its own configuration, as the data contained in each Container can be unique.
Shared Configuration Settings
The only configuration settings shared by all containers include the:
-
Ingestion configuration selected on the Source tab
-
default Filter setting on the Filter tab
-
Generate links to Document nodes setting on the Link Creation tab
Change Selected Container
To change containers, select the Container name.
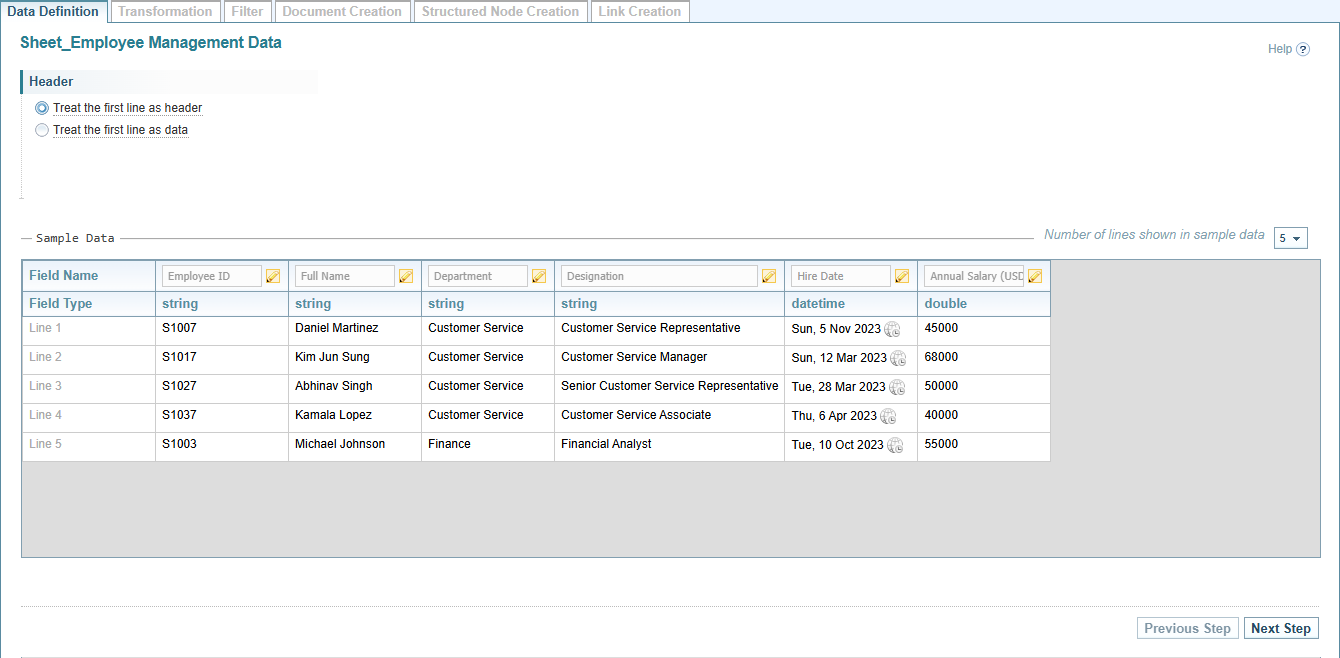
Result: The selected container will be highlighted in yellow. The Sample Data and the Configuration settings shown in the right pane will be updated.
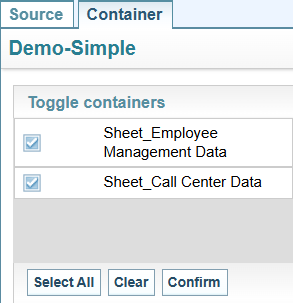
Toggle Active Containers
You can modify which containers (Worksheets or Tables) will be included in the structured load by selecting or unselecting containers using the button.
When you select the button, you can:
-
select or un-select the containers listed
-
Select to update the Containers.
Result: The containers displayed in the Containers tab are updated based on your selections.
Database Custom Query
You can define a custom query to control what data is captured from a table by selecting the button. Each custom query will have its own container.
To add a custom query:
-
Select a container and then select the button.
Result: The SQL query pane is displayed.
-
Enter a name for the query. The name assigned to the query will become the container name (with any spaces between words removed).
-
Enter the SQL query in the SQL box provided.
The Table Schema Details pane lists the Tables and Fields available to include in the query.
-
Select .
Result: If the SQL query run successfully, the results are displayed in the Data Preview.
-
When satisfied with the query results, select .
Result: The query is added as a new container in the containers pane, and a summary of the query and results is displayed in the Data Definition tab.
Edit Query
Select the  edit button to make changes to the query, if required.