Network Creation
Ingest from a Data Source
The Network Creation configuration controls how Networks are created from Documents.
There are five sections to the configuration:
-
Document filters - defines which documents to include or exclude from Network Creation.
-
Nodes - defines the nodes (document nodes and entity nodes) to include including their features, fields and clustering configuration.
-
Links - defines the nature of the links generated, including relation and colocation links.
-
Context - define words not to be used for entity discrimination when clustering.
-
Network View Default Settings - defines the entity type to be displayed by default when selecting the Network.
Access
Select Configurations > Network Creation
Document filters
You can choose which documents to include or exclude from Network Creation.
When a Document is rejected (excluded), all the entities and links in the Document are not included in the Network Creation process.
There are two general approaches you can take. You can use the filter to:
-
reject Documents that match the filter and then use the Default Filter to accept all other Documents, or
-
accept Documents that match the filter and then use the Default Filter to reject all other documents.
However, you can combine the filters in whatever way you want, keeping mind the filters are processed in order.
Filter Order
Filters are applied in the order they are listed.
The first rule that matches a document will decide whether the Document is accepted or rejected.
-
Document Tags, in the rule order.
-
Document Properties, in rule order.
-
Default Filter.
You can change the order of the rules by hovering in the left column next to a rule and selecting the up or down arrows.
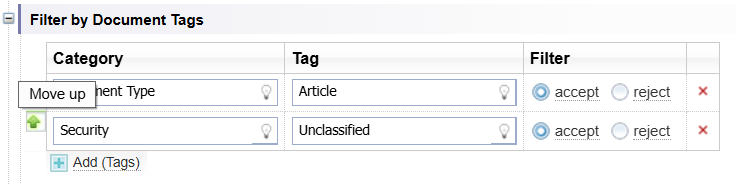
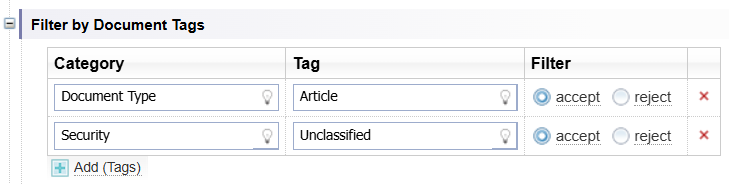
Filter by Documents Tags
You can filter by Document Tags, added during Classification and Tagging.
In this example Documents with a Document Type Tag of Article and a Security Tag of Unclassified will be included in the Network.
Filter by Documents Properties
You can filter by Document Properties.
In this example all documents in English will be included in the Network.

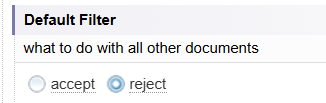
Default Filter
The Default Filter determines what happens to documents which have not met the filter criteria for Document Tags and Document Properties.
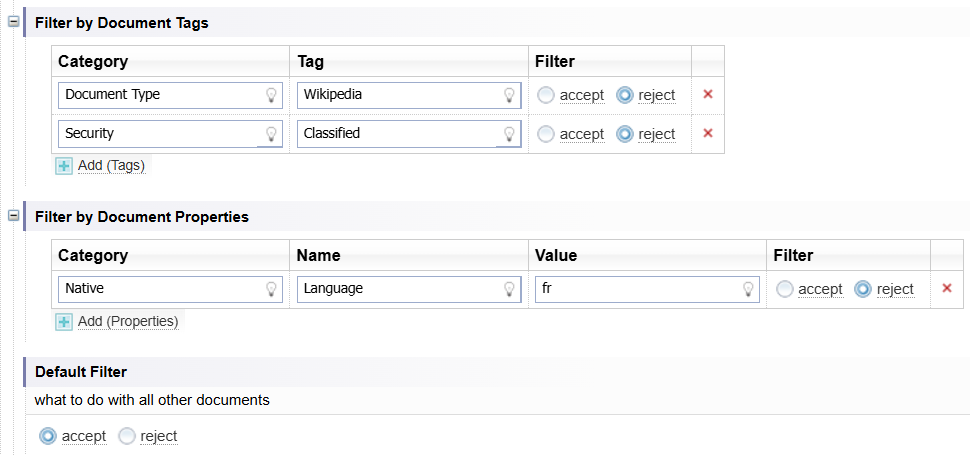
Example: Default Filter Accept
The example below shows Documents with:
-
a Document Type tag of Wikipedia will be excluded
-
a Security Tag of Classified will be excluded
-
a Document Property for Language of fr (French) will be excluded, and
all other documents will be included.
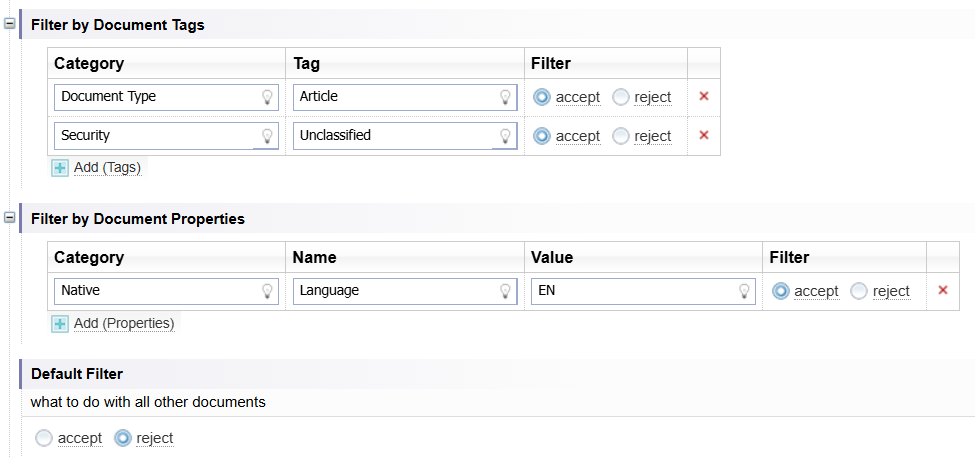
Example: Default Filter Reject
The example below shows Documents with:
-
a Document Type tag of Article will be included
-
a Security Tag of Unclassified will be included
-
a Document Property for Language of EN (English) will be included, and
all other documents will be excluded.
Nodes
The Nodes section specifies which entities are included in the Network.
Document Nodes
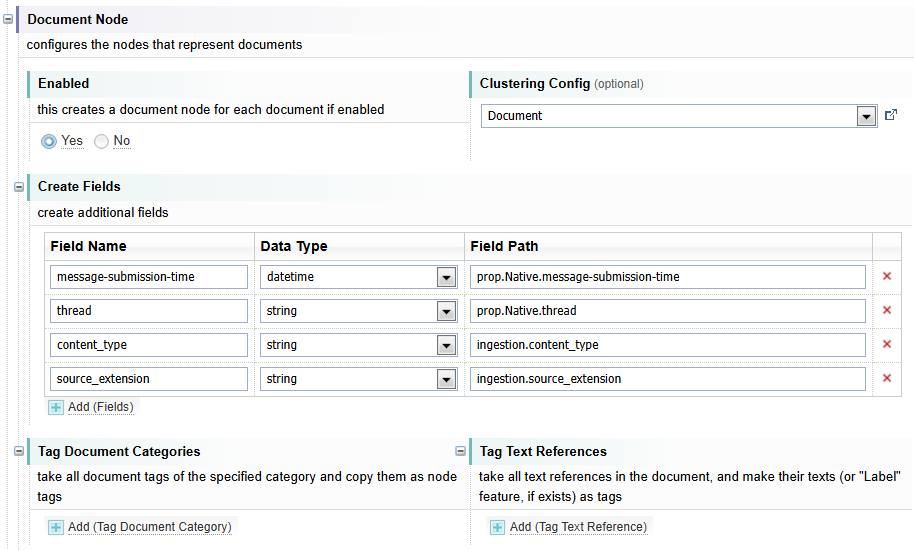
Enabled
By default, Document Nodes are created for each Document included in the Network (as set in the Filters section).
If you do not want to create Document Nodes, select No.
Clustering Configuration
This is an optional setting. You can select a Clustering configuration.
Default: The Document Clustering configuration is set as the default and will prevent duplicate document names from being created in the Network.
Example: In the example below, the [Create Singleton] clustering configuration is set. This Clustering configuration will allow documents with the same name to be created as separate Document Nodes in the Network.

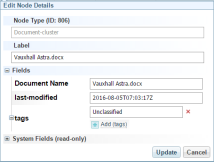
Create Fields
You can define the fields to assign to the Document Node. You use Field Path Notation in the Default Value Path field. See Field Path Notation Syntax.
In this example a new field Document Name is created as part of the document entity. The Field has the file name of the document as its value.

There are no hints in a dropdown for the Default Value Path field as the Network hasn't been built yet.
You can look at examples of field path notations in other configurations, for example Network Creation, Network Table Views, Network Field Selections and Multfile Network Export.
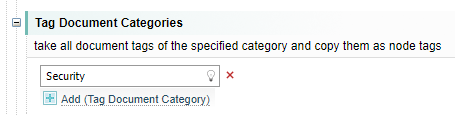
Tag Document Categories
You can assign Document Tags to apply to the Document Node.
In this example the Security tag for the document has been added.

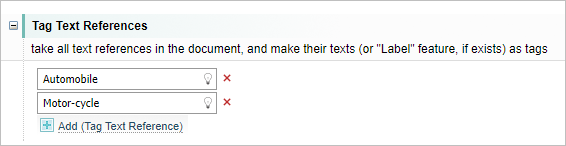
Tag Text References
You can tag the Document Node with information from Text References in the Document.
For example:
If you have an entity:
-
[Publication], you could assign the Publication's name to the Document Node as a tag.
-
[Document Type], such as Article, you could assign the Document Type to the Document Node as a tag.
In this example Automobile and Motor-cycle have been added to the Text Reference list and are created as tags for each Document Node.
Entity Nodes and Default Nodes
You can define which entities to include (enable) or exclude (disable) from the Network.
The Entity Nodes section defines the settings for listed Entity Types. Entity Nodes can have additional fields and tags added during Network Creation.
The default Network Creation configuration has several entity nodes already pre-defined in the Entity Nodes section, for example, Person and Organisation. You can add, modify or remove Entity Nodes.
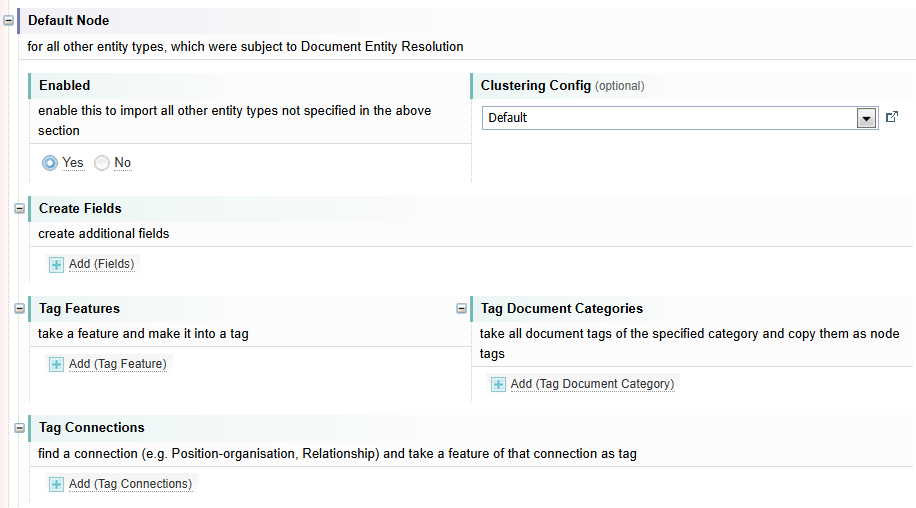
The Default Node section controls the settings for any nodes not defined in the Entity Nodes section.
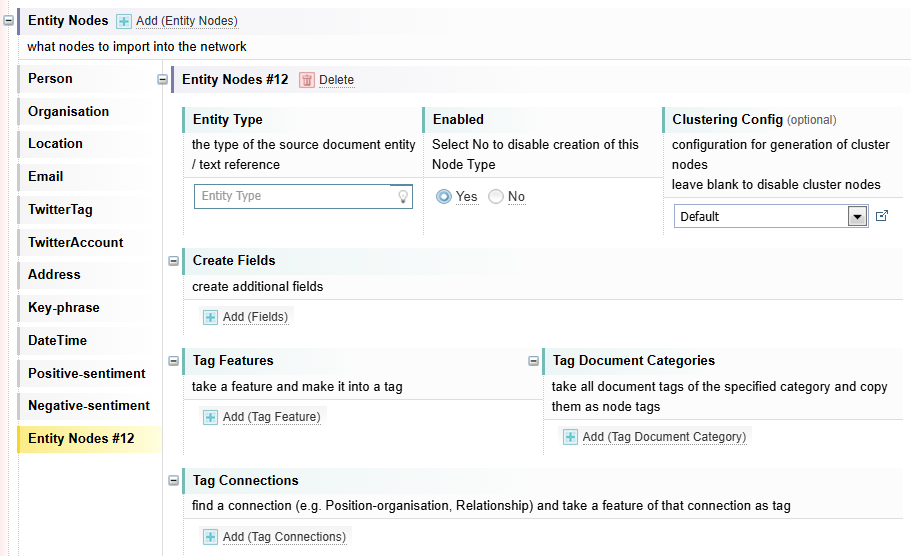
Screen Example: Entity Nodes
Below is shows the Entity Nodes section fields.
Screen Example: Default Node
Below is shows the Default Node section fields, which are similar to the Entity Nodes section.
The only difference, is there is no Entity Type and no Delete option.
Disable Nodes
You can choose which nodes are Enabled or not. If they are not Enabled, they will not be included in the Network as nodes. They continue to be marked up in the Documents.
For example, the default DateTime entity node is not enabled.
Approach
As you refine your Network, you may decide there are some nodes generated by the catch all Default Node section that are not wanted.
There are two possible approaches:
-
You can add the Entity you do not want as a node to the Entity Nodes section and change the Enabled field to No to prevent that entity from being generated as a node in the Network.
-
Add all entities you want created to the Entity Nodes section and change the Default Node section Enabled field to No to prevent any other nodes from being created.
Before adding Entity Nodes, it is helpful to first generate a Network with the Default Node section Enabled field set to Yes. This will help you identify all Entities across the all the Documents in the Collection and decide which Nodes you want to keep or disable.
Add Entity Node
To add an Entity to the Entity Nodes section:
-
Select the
 Add (Entity Nodes) option.
 -
Enter the name of the Entity Type, for example Weapon.
Result: Once you have given the entity node a name, the name is applied to the left navigation tab.
-
If you do not want this Entity to be created as a node, change the Enabled field to No.
- Complete the remaining options as described below.
-
Select .
Clustering Configuration
The Clustering configuration determines how entities are grouped into nodes in the Network.
There are clustering configurations for the built-in entity types, for example, Person.
For all other nodes (for example, nodes you add or default nodes), you can choose between two generic clustering configurations:
-
Default: If two entities have the same name, label field or RID field, then combine their properties and create a single entity.
-
[Create Singleton]: Create a separate entity for each entity during Network Creation, even if they are identical.
A node with a feature with the field name "RID", gives that entity a unique ID on which to cluster entities. This is illustrated in the diagram in Links to Structured Nodes
Leaving the Clustering Config field blank will apply the Default clustering configuration.
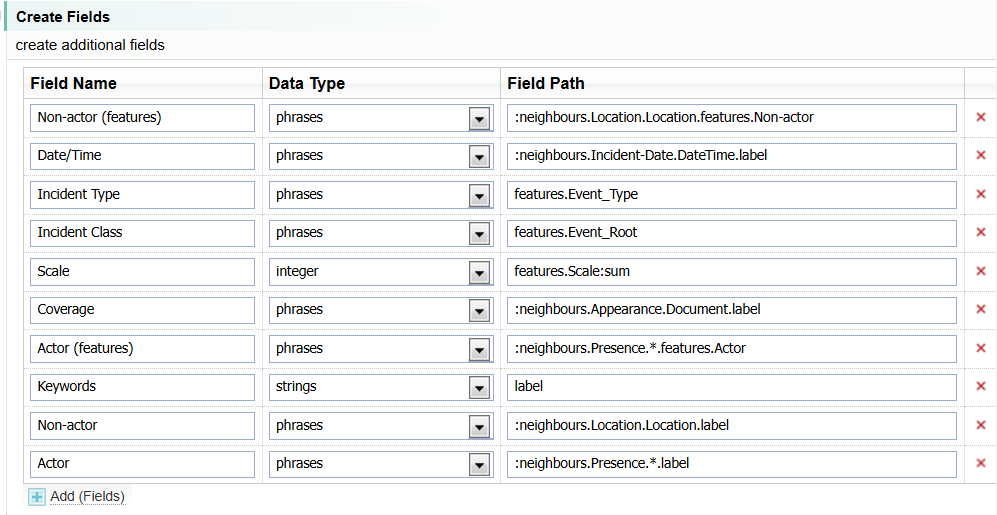
Create Fields
You can add additional fields to the node.
You use Field Path Notation in the Default Path field to identify the values you want to add to the field. See Field Path Notation Syntax.
Node Tags
You can create Node tags from Features, Document Categories or Connections.
Tags appear as coloured segments around the Node in a Network Graph.
Generally, you would only create tags using one of these methods. Otherwise, you may end up with too many tags.
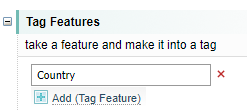
Tags from Features
You can create node tags from a feature in the entity.
For example, the Country feature is added as a Tag to each Automobile entity. If the entity does not have the feature, then it is ignored.
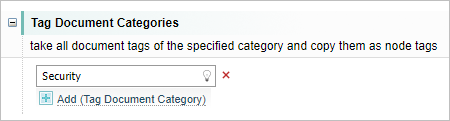
Tags from Document Categories
You can create node tags from the Document Tags of Documents from which the entity was extracted.
For example, the Document Tag with the category Security is applied to all Automobile entities.
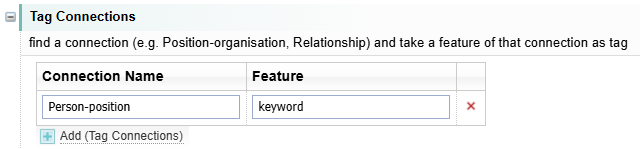
Tags from Connection Features
You can create node tags from the features of Links connected to the entity.
For example, the keyword features from the Person-position link is added as a tag. This would usually be the position title roles held by the person.
Delete Entity Node
To delete an Entity from the Entity Nodes section, select the  Delete option displayed at the top of the node settings for the currently selected node.
Result: The node is deleted and is no longer displayed in the left navigation tab.
When you select the Delete icon, the node is deleted immediately.
There is no confirmation message before deleting.
If you delete a node in error and you haven't yet saved the changes, you can restore the node by selecting the button.
The configuration will close and the changes made will not be saved. When you open it again, the node you deleted will be restored.
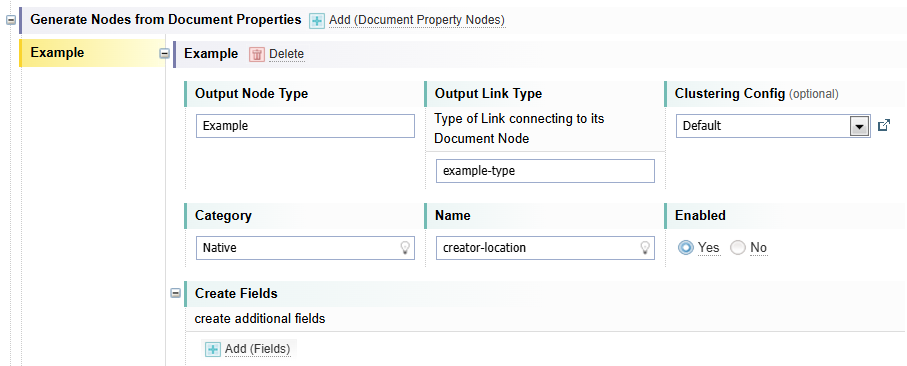
Nodes from Document Properties
You can create nodes from Document Properties.
|
Option |
Description |
|---|---|
|
|
Select the Add option to create a new Node definition created from Document Properties. |
| Output Node Type | Give the Node Type a name. |
| Output Link Type | Give the Link a name. The link connects this new Node Type to its Document Node. |
| Clustering Config | Select the Clustering configuration (see Clustering Configuration above). |
| Category | Select the Category of Document Properties you are creating a node from. |
| Name |
Select the name of the Document Property you are creating a node from. Expand the Document Properties section in a few Documents in your Collection to see the Document Properties that may be valuable to capture as Nodes. |
| Enabled |
Select No, if you want to keep the Node settings but prevent them from being created. This can be a useful feature when testing the results of different settings in your Network Creation configuration. |
| Create Fields |
You can add additional fields to the node. You use Field Path Notation in the Default Path field to identify the values you want to add to the field. See Field Path Notation Syntax. |
|
Delete
|
Select to delete the node settings. |
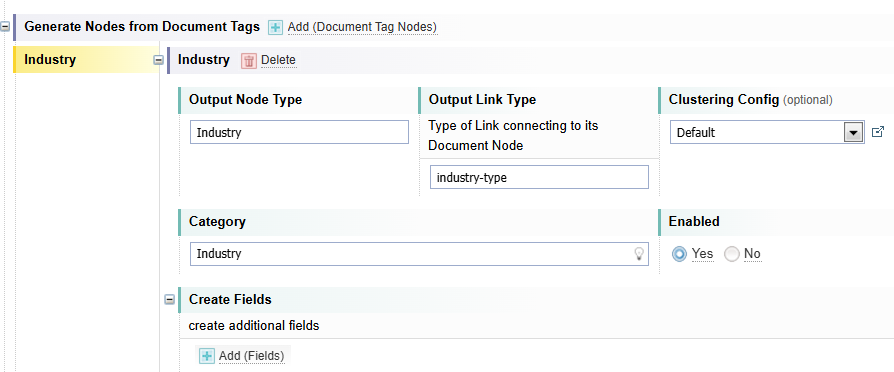
Nodes from Document Tags
You can create nodes from Document Tags.
|
Option |
Description |
|---|---|
|
|
Select the Add option to create a new Node definition created from Document Tags. |
| Output Node Type | Give the Node Type a name. |
| Output Link Type | Give the Link connecting this Node Type to its Document Node. |
| Clustering Config | Select the Clustering configuration (see Clustering Configuration above). |
| Category |
Select the Category of Document tags you are creating a node from. Expand the Document Properties section in a few Documents in your Collection to see the Document Properties that may be valuable to capture as Nodes. |
| Enabled |
Select No, if you want to keep the Node settings but prevent them from being created. This can be a useful feature when testing the results of different settings in your Network Creation configuration. |
| Create Fields |
You can add additional fields to the node. You use Field Path Notation in the Default Path field to identify the values you want to add to the field. See Field Path Notation Syntax. |
|
Delete
|
Select to delete the node settings. |
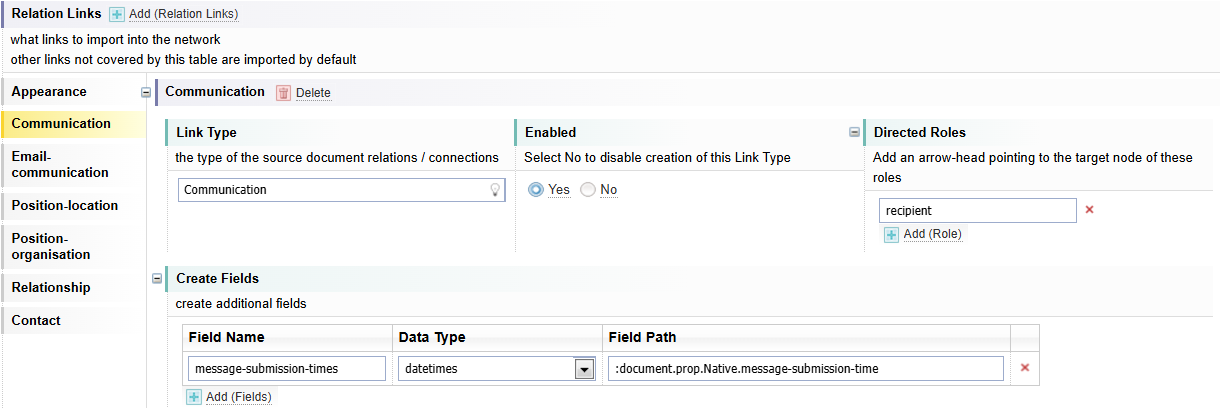
Links
Relation Links
Relation links are the links that represent a relationship (or connection) between two nodes. They are generated during Entity Extraction in documents and are clustered into the Network.
All links in a document are included in the Network by default unless they are specifically disabled using the Relation Links settings.
You can add, modify and delete the link settings, as required.
|
Option |
Description |
|---|---|
|
|
Select the Add option to create a new Link definition. |
| Link Type | Enter the Link Type name. |
| Enabled | Select No, if you want to prevent this Link Type from being added to the Network. |
| Directed Roles |
Links can have a Link Direction, shown as an arrow on the Network Graph. You create an arrow by:
To have no arrows, do not add any roles. To have two arrows (pointing in both directions), add an additional role and enter the other role in the second Role field. To identify the roles associated with a Link Type, you can view the Network Link table. The roles are identified in the Role 1 and Role 2 columns. For example, the Appearance link type has two roles:
To have the arrow point towards the node with the entity-of role, enter "entity-of" in the Role field. |
| Create Fields |
You can add additional fields to the node. You use Field Path Notation in the Default Path field to identify the values you want to add to the field. See Field Path Notation Syntax. |
|
Delete
|
Select to delete the link settings. |
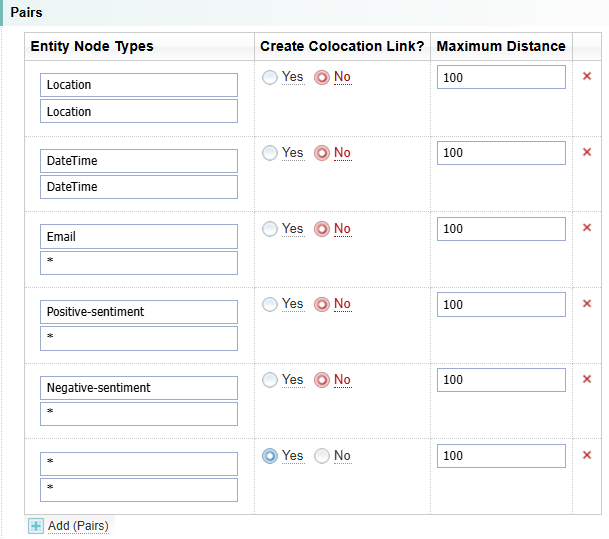
Colocation Links
Colocation links are links between Text References of entities that are mentioned very close to each other in the Document.
Example
In this example, two locations mentioned in close proximity will not have a colocation link created. This is because locations are often mentioned in close proximity and would result too many links without much value.
An alternative approach is to enter the entity pairs you want to identify and enable colocation links for those pairs and then disable all other colocation links.
|
Option |
Description |
|---|---|
|
|
Select the Add option to add a new row. |
| Entity Node Types |
Identify the two Node Types you want to define the Colocation link between. You can have two same Node Types. A wildcard (indicated by *) means any type. The last rule should be between two wildcards to address all remaining pairs, as shown in the Example above. Rules are executed in order. |
| Create Colocation Link |
Defaults to Yes. Select No, if you do not want the Colocation Link added to the Network. |
| Maximum Distance |
Define the maximum distance the two Node Types are apart in the document in characters. Defaults to 100. |

|
Select to remove icon to remove a row from the table. |
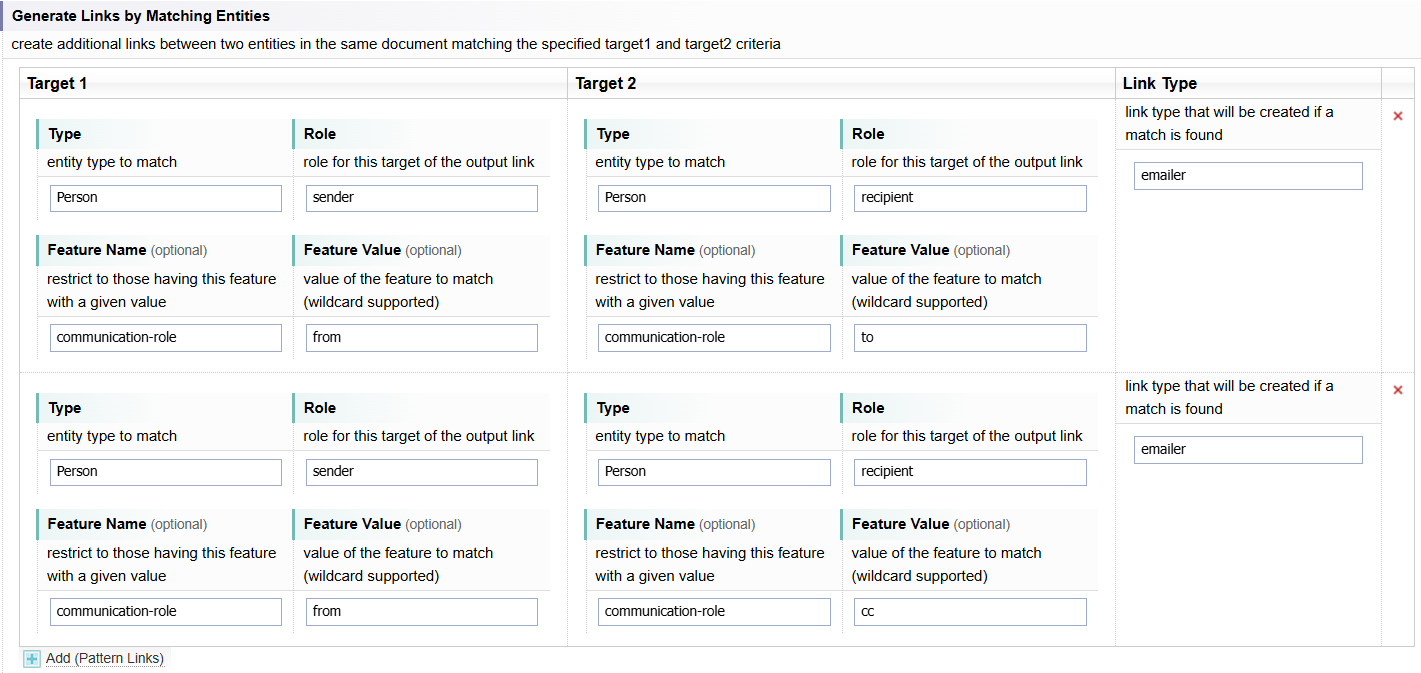
Matching Entity Links
You can create links between entities in the same document that having link roles that match the rules set.
Example
In the following example, a link called emailer is defined.
The emailer link is created between two Person entities when a Person has the feature communication-role with a value :
-
"from" - they will have the link Role of "sender".
-
"to" or "cc" - they will have the link Role of "recipient".
|
Option |
Description |
|---|---|
|
|
Select the Add option to add a new row. |
|
Target 1 |
Repeat for Target 2 |
| Type |
Enter the Entity Node Type. |
| Role |
Enter the target role. |
| Feature Name (optional) |
Only create links between the Entity nodes when the named feature has a given values.
|
|
Feature Value (optional) |
|
|
Link Type |
The name of the Link to be created. |
|
|
Select to remove icon to remove a row from the table. |
Another Example
An Entity Extraction Script is set up to mark a certain Person entity with feature "$investigator" equal to "true", and another Person entity with feature "$suspect" equal to "true".
The goal is to create a link "Investigation" between those two entities. The corresponding configuration is as follows:
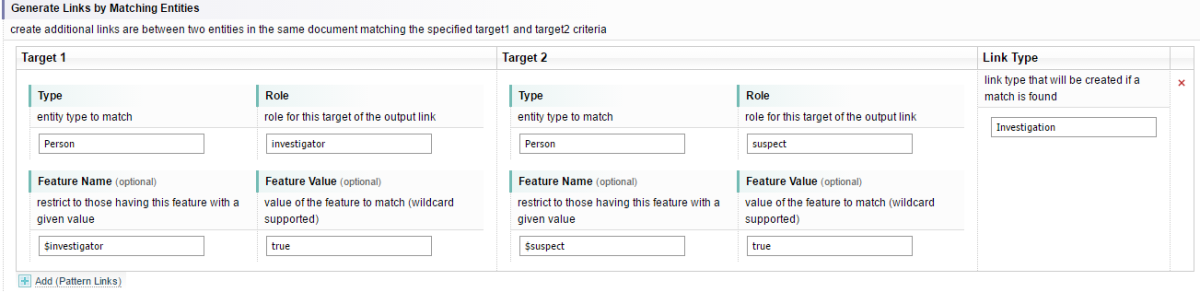
The feature names start with the prefix ‘$’ to indicate that they are valid on per-document basis and shouldn't be copied to the network. See "Features" section of Entity Extraction Script for details.
Context
Entity context blacklist
You can list specific words that are not useful for entity discrimination. Each word is separated by a comma.
Sintelix looks for words to provide context to an entity, and to discriminate it from other similar entities. Sometimes, words may feature frequently that do not add to the context of an entity. For example, legal disclaimers, ingestion location, etc.

Network View Default Settings
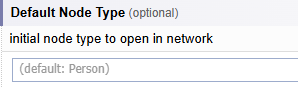
Default Node Type (optional)
You can set the initial node type to open when you select Network.
The default is Person. You can change it to an entity node more meaningful to the purpose of your analysis, for example to Events.